Below you will find some helpful information and Tips & Tricks to help you with your Thesis or other Printing and Binding requirements.
 What is PDF?
Portable Document Format (PDF) is an independent, open standard for fixed layout of documents. This means that when you provide any printer with a document in PDF, the layout you see when you view the PDF file is exactly what will be reproduced by the printer, unlike other formats (E.g. Microsoft Word) where what a printer produces may be different than what you see on your screen.
Why should I convert to PDF?
To ensure we print exactly what you require when you send in your thesis or any other document for printing, we require that you send it as a PDF. Since Office 2010 and beyond "Save As PDF" feature is built in. Most newer word processing software now has the PDF feature available. For other word-processing software, you may need to use one of the many free converters.
We recommend any of these free converters:
Remember! Once you've created it, ensure to proofread the PDF paying particular attention that the page layout, chapter headings, and page numbers have all been reproduced correctly. If you want black & white printing, make sure the print is not greyscale. Greyscale is detected as colourand costs more than black & white print.
Now that you've created your PDF, you can use our online forms to send it to us or bring it to us on a USB memory stick, Data card or DVD.
To avail of our Same Day Thesis Print + Bind Service simply follow these steps-
- Complete our Thesis Order Form 1-2 days before you plan on getting your thesis bound.
(Please ensure that all information you fill out on the form is spelt correct as we use this information to make your covers in advance.) - Once printed you will receive a text message with a time for collection and the total cost. Binding takes approx 5 hours.
- Pick up your bound copies from our workshop, or let us know if you require delivery.
Page Numbers
The page numbers are a guideto let us know how thick to make your cover.
Kennys Bindery Printing
If we are printing your thesis for you we use a high-quality 120gsm white paper.
Every page of every copy is printed, not photocopied, thus guaranteeing the highest qualityno matter how many copies you require.
Printing it yourself
If you are printing your thesis yourself then please look on the side of the packaging to see what grammage the paper is (i.e. 80gsm, 100gsm, 120gms)
* Please note the majority of Universities request that theses be printed on 110gms and over*
Double-sided printing
We can print your thesis double-sided, if you require this service then put the full amount of pages on the order form and Select double-sided printing.
For help formatting your margins for double-sided printing check out our article on configuring-margins
University-specific requirements
There is an additional information section on our form, in which you may tell us if you would like the university name, school or department etc. placed on the cover or any other requirementsfrom your University regarding the layout. You can also use this section if you require any of the words on your title to be in Italics. Please put the exact words required in the additional information section.
What are the different styles of binding
We offer 4 styles of thesis binding.
1) Hardbound
Your thesis will be thread-sewn, hardbound in a leatherette cover with gold embossing front and spine
2) Softbound /Gumbound
Your thesis will be Gumbound with a leatherette cover with gold embossing on the front cover only.
3) PVCbound
Your thesis will be thermal bound with a clear cover at the front and black card at the back.
4) Wirebound
Your thesis will be wire bound using a black metal wire with a clear cover at the front and black card at the back.
Preparing your document for printing and binding is easy. Here we show you how to configure margins on your pages and how to allow for A3 pages and other outsized pages that you may have such as maps or large data tables.
Setting the Margins for Printing
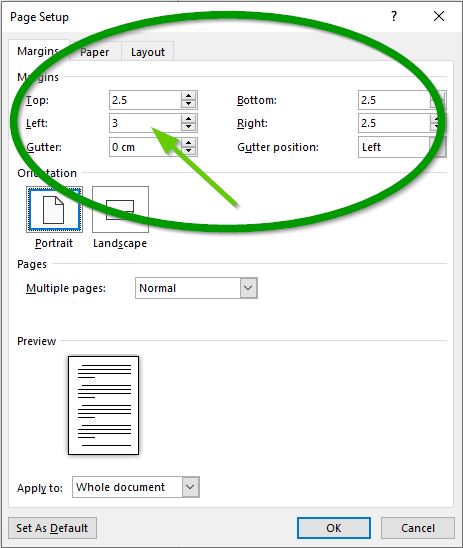
For single-sided printing, the left-hand margin is required to be 3cm or greater to allow for the binding process. Each of the other three margins should be 2.5cm.
For Double Sided printing all four margins should be set as 2.5cm.
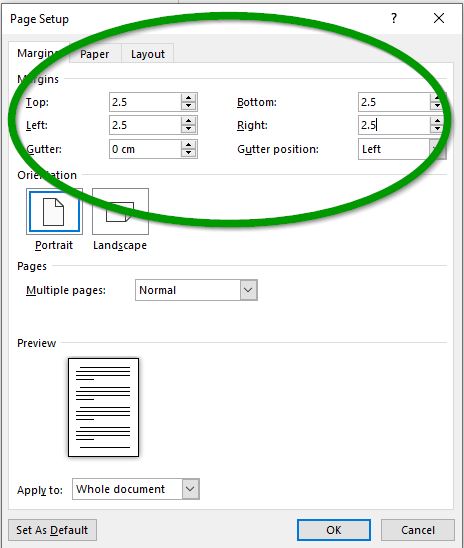
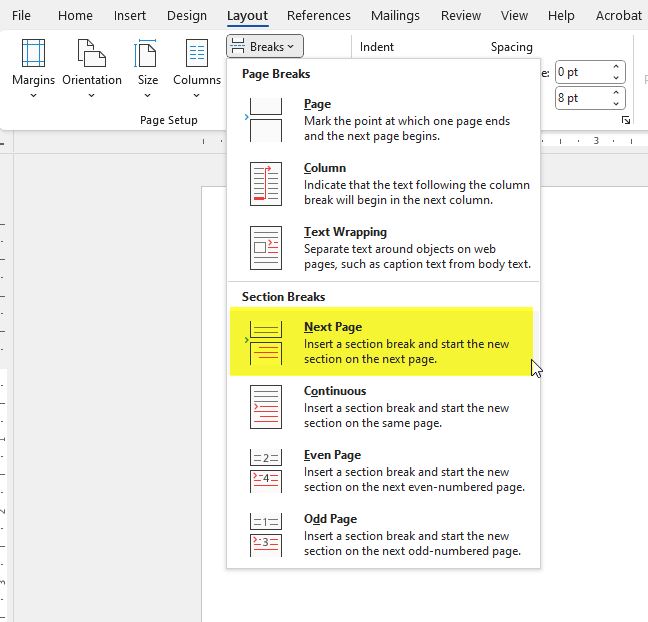
To set the page margins open the Page Layout dialog (Layout >>Margins >> Custom Margins - OR - File >> Print >> Page Setup) In the Page Layout dialog box, you can change the margins as shown.
When you click OK, the document margins will be resizedto what you have selected. This may change where page breaks and diagrams are placed in your document so recheck the layoutto ensure you are happy with it.

Dealing with A3 or outsize size pages
All A3 or other pages/maps/diagrams larger than A4 should have a margin at the top and left-hand side of at least 2 cm, as shown below. Please advise us if you have any sheets bigger than A4 and we will fold them for you to ensure that the folds are not trimmed off in the binding process and that they fold out as you intend.
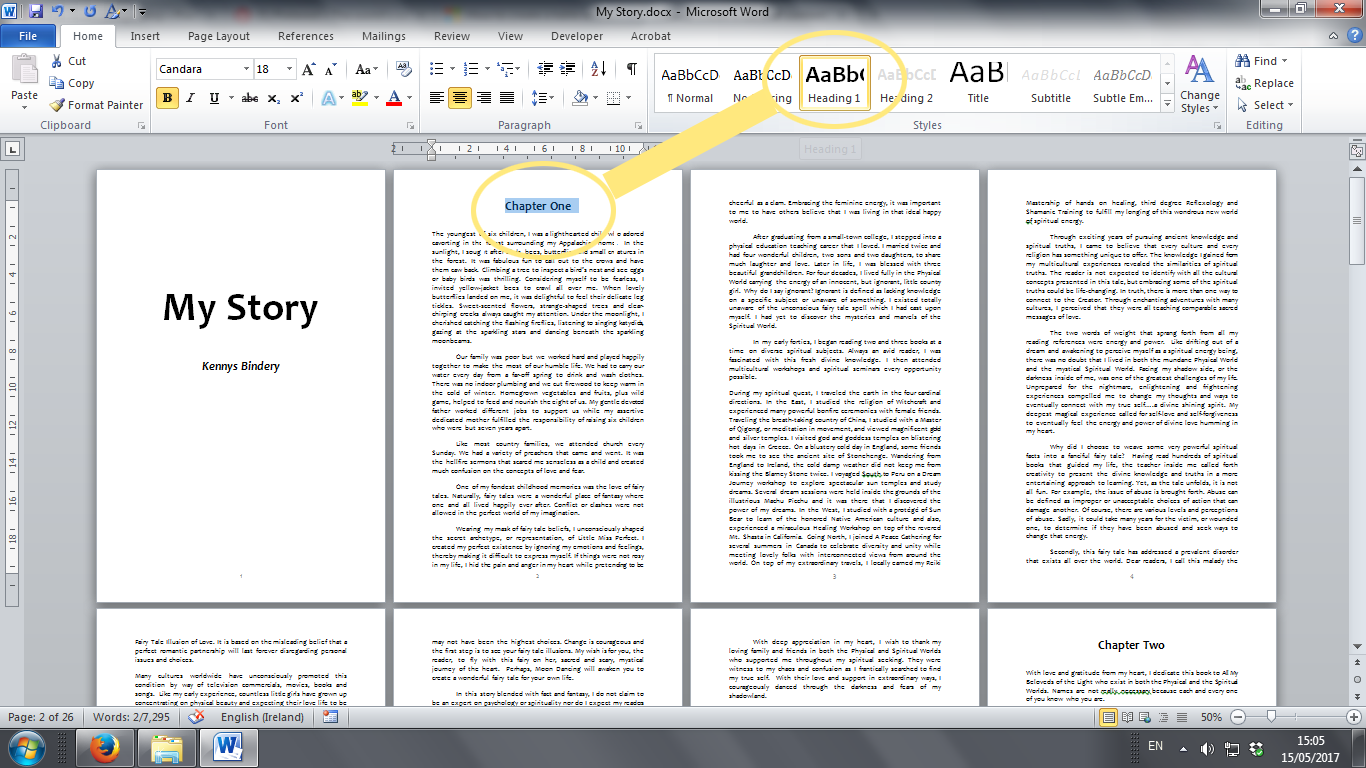
The key to creating a Microsoft Word Automatic Table of Contents is using the “Styles Menu” in your document.
Step-by-Step Guide
- Highlight your Heading i.e. CHAPTER ONE
- Select HEADING in the styles menu above
(Do this throughout the whole document)
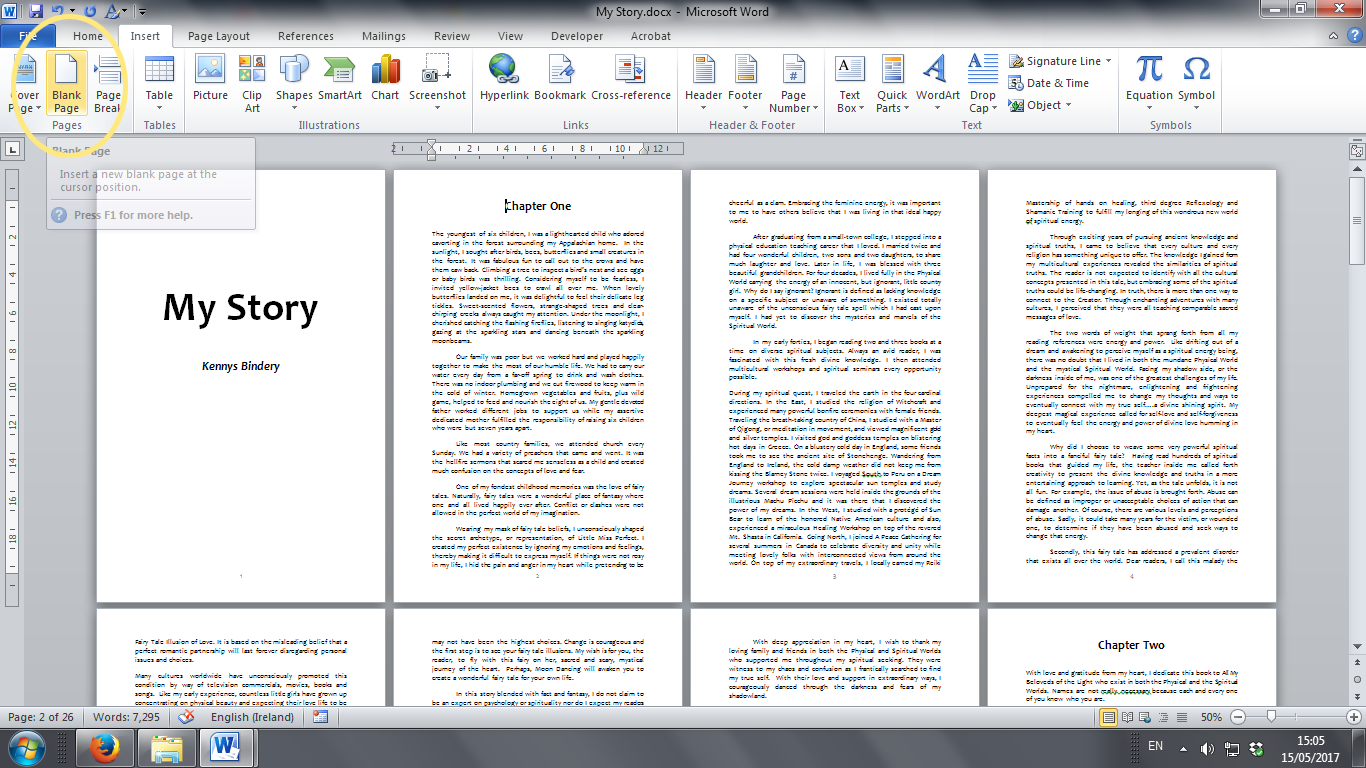
- Insert a blank page where you want your table of contents to appear
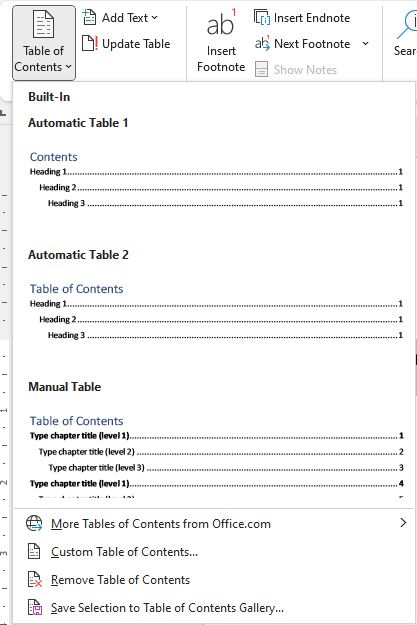
- From the top menu select “References” – “Table of Contents”

- Select which “Automatic Table of Contents” you want from the drop-down menu
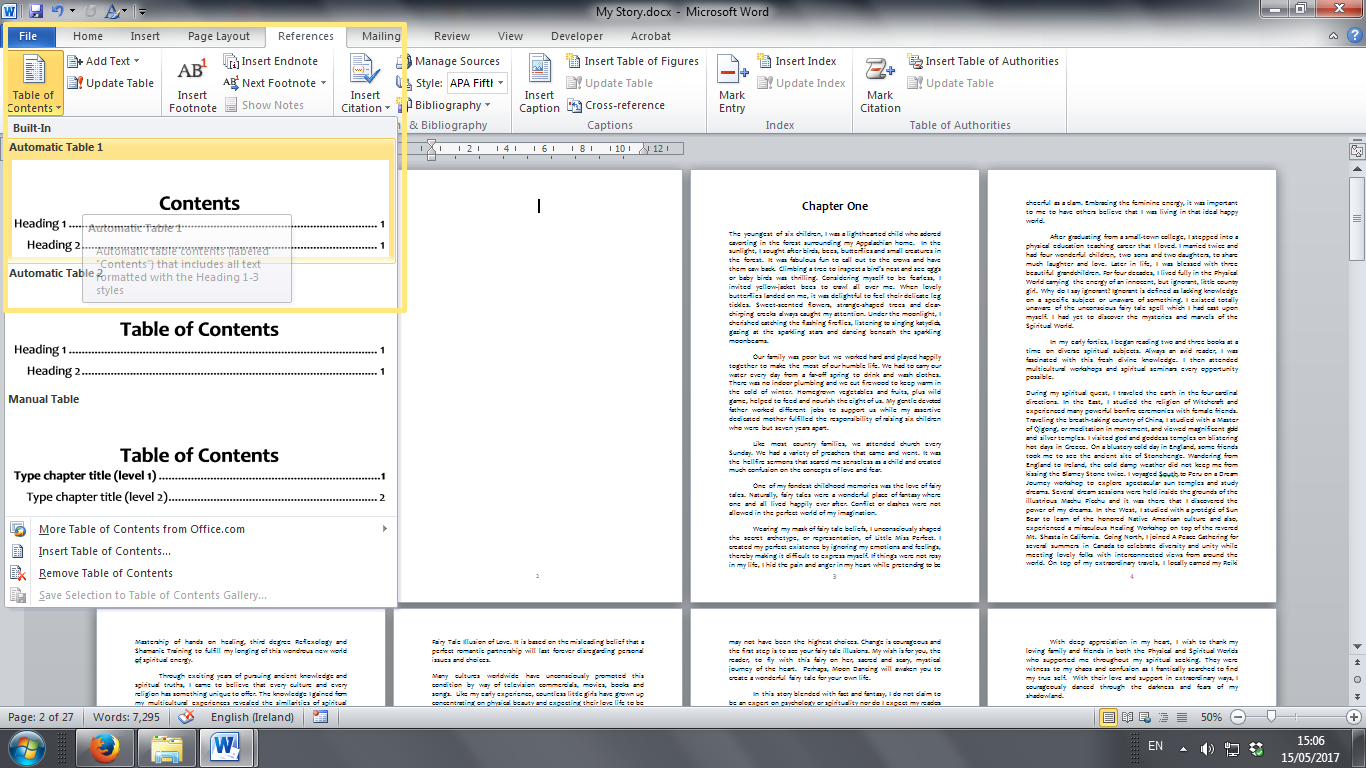
- TOC will then be inserted into the blank page
Microsoft Office is one of the most popular office suites out there. Microsoft Word is our go-to program for formatting books. Learn these key features for efficiency and a consistent professional-looking document.
Here are 5 tips you need to know! Setup your document right at the start and the rest will be a breeze.
-
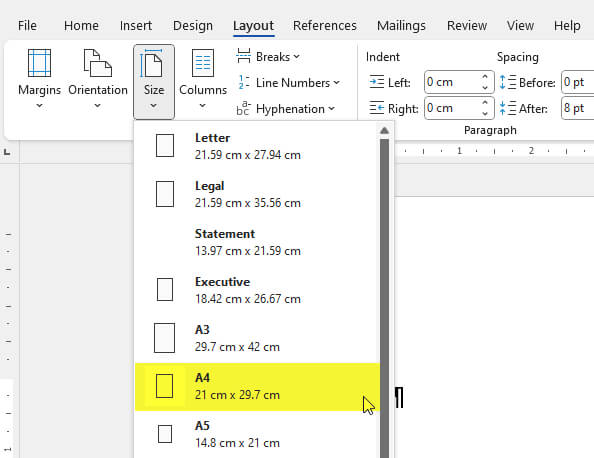
PAGE SIZE
Often forgotten about but make sure your page is set as A4, not US Letter, which can be default in some versions of Word.
To set your page size, from the top menu
Select "LAYOUT"
Select "SIZE"
Select "A4"
-
MARGINS
Margins are very important when it comes to binding. No margins = Text/images cut off in the binding process.
For single-sided printing, we recommend a margin of 3cm on the left side and 2.5 cm on the other three sides.
For double-sided printing, we recommend a margin of 2.5 cm on all four sides.
To set your page margin, from the top menu-
Select "PAGE LAYOUT"
Select "MARGINS"
Input "top, left, bottom and right" sizes as per requirements
-
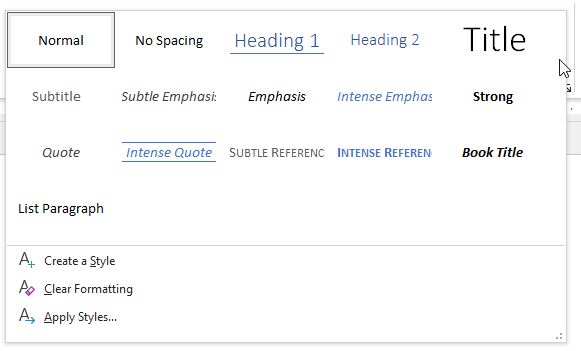
STYLES MENU
The styles menu is an absolute must for any document!
What are styles? Styles are pre-defined formatting that you can use repeatedly throughout your thesis.
Want all your headers/subheadings/paragraphs to be formatted the same, use the styles menu.
Also, if you use styles, it brings me to my next tip "Automatic TOC"
-
AUTOMATIC TABLE OF CONTENTS
If you used styles for your headings, you can now use the Automatic Table of Contents feature.
See our previous tip on how to create an AUTOMATIC TABLE OF CONTENTS
-
NUMBER PAGES DIFFERENTLY
Every thesis will require Roman Numerals for the title page/table of contents pages and Arabic numbers from chapter one onwards.
Here is a very useful guide from Microsoft on how to number pages differently
Add different page numbers or number formats to different sections
1: Colour Printing
- One big way to save money on your thesis costs is to cut back on colour printing.
- Websites, hyperlinks and email addresses can appear in blue change these to black.
- Change any other colour that you don’t need such as page numbers, headers etc. to black, giving you a saving of 40c per page!
2: Formatting & Proofreading
- Before sending your PDF for printing check the PDF file one last time.
- Check page numbers are included, check your table of contents, check your name is spelt correctly and check nothing has jumped to another page.
- Take your time and do one last proofread to see if you can spot any last changes. This will minimise the need for costly reprints.
3: Order Form
- Before filling out our online thesis order form check with your university if they have any specific binding requirements, such as a certain cover and spine layout or a certain colour cover.
- Make sure the name you put on the order is the same as it appears on your Student ID card.
- Your university might not accept your bound thesis unless it meets their requirements, by checking this can save you from any re-binding costs.
